Andrewm1234 (talk | contribs) (Changed color of Jigglypuff's info box, as it is not available in Yellow Version) |
Andrewm1234 (talk | contribs) (Correctly color-coded some info boxes to correspond to their applicable game versions.) |
||
| Line 19: | Line 19: | ||
{|{{prettytable|notwide=1}} align="left" style="font-size:smaller" | {|{{prettytable|notwide=1}} align="left" style="font-size:smaller" | ||
|- | |- | ||
|style="background: | |style="background:#c080ff"|'''1'''||style="background:#c080ff"|Lass||style="background:#c080ff"|[[File:Pokebuck.png]]135 | ||
|- | |- | ||
|style="background: | |style="background:#c080ff"| ||Pidgey||LV9 | ||
|- | |- | ||
|style="border-bottom:2px solid grey;background: | |style="border-bottom:2px solid grey;background:#c080ff"| ||style="border-bottom:2px solid grey"|Pidgey||style="border-bottom:2px solid grey"|LV9 | ||
|- | |- | ||
|style="background: | |style="background:#c080ff"|'''2'''||style="background:#c080ff"|Bug Catcher||style="background:#c080ff"|[[File:Pokebuck.png]]100 | ||
|- | |- | ||
|style="background: | |style="background:#c080ff"| ||Caterpie||LV10 | ||
|- | |- | ||
|style="background: | |style="background:#c080ff"| ||Weedle||LV10 | ||
|- | |- | ||
|style="border-bottom:2px solid grey;background: | |style="border-bottom:2px solid grey;background:#c080ff"| ||style="border-bottom:2px solid grey"|Caterpie||style="border-bottom:2px solid grey"|LV10 | ||
|- | |- | ||
|style="background: | |style="background:#c080ff"|'''3'''||style="background:#c080ff"|Youngster||style="background:#c080ff"|[[File:Pokebuck.png]]165 | ||
|- | |- | ||
|style="background: | |style="background:#c080ff"| ||Rattata||LV11 | ||
|- | |- | ||
|style="border-bottom:2px solid grey;background: | |style="border-bottom:2px solid grey;background:#c080ff"| ||style="border-bottom:2px solid grey"|Ekans||style="border-bottom:2px solid grey"|LV11 | ||
|- | |- | ||
|style="background: | |style="background:#c080ff"|'''4'''||style="background:#c080ff"|Bug Catcher||style="background:#c080ff"|[[File:Pokebuck.png]]90 | ||
|- | |- | ||
|style="background: | |style="background:#c080ff"| ||Weedle||LV9 | ||
|- | |- | ||
|style="background: | |style="background:#c080ff"| ||Kakuna||LV9 | ||
|- | |- | ||
|style="background: | |style="background:#c080ff"| ||Caterpie||LV9 | ||
|- | |- | ||
|style="border-bottom:2px solid grey;background: | |style="border-bottom:2px solid grey;background:#c080ff"| ||style="border-bottom:2px solid grey"|Metapod||style="border-bottom:2px solid grey"|LV9 | ||
|- | |- | ||
|style="background: | |style="background:#c080ff"|'''5'''||style="background:#c080ff"|Lass||style="background:#c080ff"|[[File:Pokebuck.png]]150 | ||
|- | |- | ||
|style="background: | |style="background:#c080ff"| ||Rattata||LV10 | ||
|- | |- | ||
|style="border-bottom:2px solid grey;background: | |style="border-bottom:2px solid grey;background:#c080ff"| ||style="border-bottom:2px solid grey"|Nidoran♂||style="border-bottom:2px solid grey"|LV10 | ||
|- | |- | ||
|style="background: | |style="background:#c080ff"|'''6'''||style="background:#c080ff"|Youngster||style="background:#c080ff"|[[File:Pokebuck.png]]210 | ||
|- | |- | ||
|style="border-bottom:2px solid grey;background: | |style="border-bottom:2px solid grey;background:#c080ff"| ||style="border-bottom:2px solid grey"|Spearow||style="border-bottom:2px solid grey"|LV14 | ||
|- | |- | ||
|style="background: | |style="background:#c080ff"|'''7'''||style="background:#c080ff"|Bug Catcher||style="background:#c080ff"|[[File:Pokebuck.png]]110 | ||
|- | |- | ||
|style="background: | |style="background:#c080ff"| ||Caterpie||LV11 | ||
|- | |- | ||
|style="border-bottom:2px solid grey;background: | |style="border-bottom:2px solid grey;background:#c080ff"| ||style="border-bottom:2px solid grey"|Metapod||style="border-bottom:2px solid grey"|LV11 | ||
|- | |- | ||
|style="background: | |style="background:#c080ff"|'''8'''||style="background:#c080ff"|Lass||style="background:#c080ff"|[[File:Pokebuck.png]]210 | ||
|- | |- | ||
|style="border-bottom:2px solid grey;background: | |style="border-bottom:2px solid grey;background:#c080ff"| ||style="border-bottom:2px solid grey"|Jigglypuff||style="border-bottom:2px solid grey"|LV14 | ||
|} | |} | ||
{| {{prettytable}} align="right" style="font-size:larger" | {| {{prettytable}} align="right" style="font-size:larger" | ||
Revision as of 23:53, 11 February 2011
| Red | Blue | Yellow |
|---|---|---|
Purchase in |
Purchase in | |
After you receive the Boulder Badge, other Pokémon trainers will see you as a worthy opponent. No fewer than eight trainers wait to challenge you along Route #3. You'll have a tough struggle getting through them all, but you'll emerge from Route #3 a more powerful (and richer) trainer than ever. Stock up on Poké Balls to capture some more Pokémon in the wild too.
| Pidgey |
50% | 50% | N/A |
| 40% | 40% | 55% | |
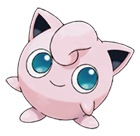
| Jigglypuff |
10% | 10% | N/A |
| N/A | N/A | 15% | |
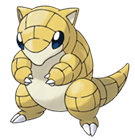
| Sandshrew |
N/A | N/A | 15% |
| N/A | N/A | 15% |
On the way to Mt. Moon
There are eight disgruntled Pokémon trainers between Pewter City and the entrance to Mt. Moon, but they're pretty easy to avoid (by staying out of their direct line of sight). Still, you may need the EXP: Mt. Moon is tough.
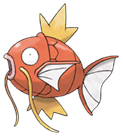
At the Mt. Moon Pokémon Center, you can pick up a black market Magikarp for ![]() 500. As for wild Pokémon, Jigglypuff are only decent in Red or Blue, but Yellow players shouldn't move on without a Sandshrew in tow.
500. As for wild Pokémon, Jigglypuff are only decent in Red or Blue, but Yellow players shouldn't move on without a Sandshrew in tow.
| #39 Jigglypuff | #27 Sandshrew |
|---|---|
 |
 |
| #129 Magikarp | |
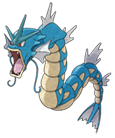
  BUT if you can get one to level 20, it will evolve into Gyarados, a Water/Flying-type with great stats and a decent move pool. If you want, you can buy it to begin leveling it up now. However, this will devour many experience points that would have gone to other Pokémon at this early stage. You can fish for a Magikarp anywhere some other time once you get the Old Rod. | |